Difference between revisions of "Bonus Skips"
Brooklyn9d5 (talk | contribs) (→Roulette (W3 & W5)) |
Brooklyn9d5 (talk | contribs) (→Flip Cards (W1 & W5)) |
||
| Line 119: | Line 119: | ||
=== Flip Cards (W1 & W5) === | === Flip Cards (W1 & W5) === | ||
| − | *'''0 Flips''' - 9.41s <br /> | + | *'''0 Flips''' - 565 frames (9.41s) <br /> |
| − | *'''1 Flip - Lose''' - 8.51s <br /> | + | *'''1 Flip - Lose''' - 511f (8.51s) <br /> |
| − | *'''1 Flip - Win''' - 13. | + | *'''1 Flip - Win''' - 802f (13.36s) <br /> |
*If you want try your luck to get a +20 star item, open 1 or 2 cards, otherwise, leave immediately. | *If you want try your luck to get a +20 star item, open 1 or 2 cards, otherwise, leave immediately. | ||
| + | *Mashing upon exiting saves 127f (2.11s) and 191f (3.18s) if you flip 1 card and lose. | ||
=== Scratch and Match (W1 & W4) === | === Scratch and Match (W1 & W4) === | ||
Revision as of 22:41, 3 February 2019
Contents
Video Demonstrations
|
1-1: [1] [2] |
2-1: [13] |
3-1: [27] [28] [29] |
4-1: [42] [43] |
5-1: [59] [60] |
6-1: [71] [72] |
Basic Information
- There are 42 levels in Yoshi's Island that have goal rings and in a 100% speedrun, there are 41 levels that can result in a bonus game, 1-E being the exception. If you were to get a bonus in 1-E, Poochy's sprite would become glitched due to memory limitations when displaying him and the bonus challenge sprite at the same time. To avoid this, the developers just made getting a bonus impossible.
- Bonuses cost around 10-30 seconds depending on which one you get.
- They're not random and can be reliably skipped in every level, drastically reducing the time of a 100% speedrun.
- Running full speed and jumping into the goal ring will cause the roulette to always land on the bottom left flower. This is because the goal loads in at the same time, every time.
- If you slow down just a little bit before entering the goal ring, you can skip the bonus.
- Conversely, if you speed up via speed oscillation, you can also skip it.
Skipping Bonus Games
There are a few different methods used to skip bonuses:
Zewing
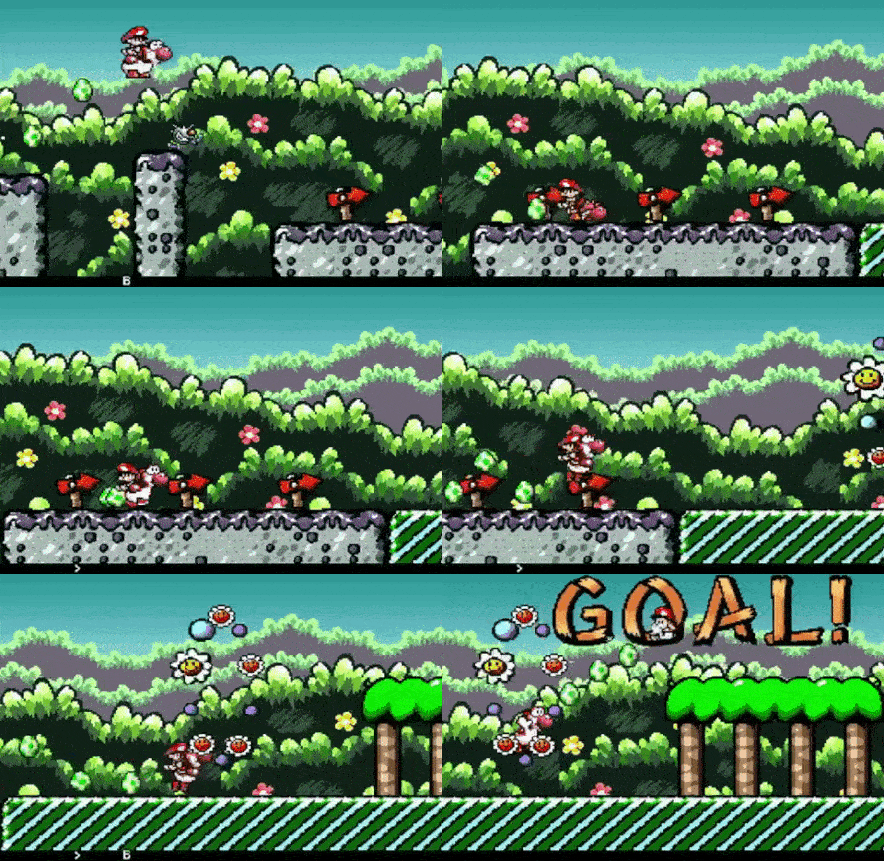
- Named after it's creator, the Zewing bonus skip is the most used and practical method. While running at full speed, hold forward and spit out an enemy as you jump into the goal ring. [88] This causes you to slow down just enough to skip the bonus game. Normally, you'd want to release the dpad when you spit out an enemy to avoid losing speed, but here, it works to your advantage. Keep in mind, it is a 9 frame window.
- A good visual cue is when Yoshi's nose is just about to touch the bottom left flower. Using this method, the goal ring should always land on the dot after this flower.
- This also works with Koopa shells, pokey projectiles and watermelon seeds.
- This is a variant of the Matt bonus skip where you would spit out an enemy then immediately tongue upwards while still on ground, however, this was much less lenient.
- As a backup strat, you could try to do a Zewing without an enemy but it only has a 3 frame window. Unless you only press Y for 3 frames or less, in which case, you can extend this window by 25 extra frames but then you don't really have a good visual cue plus it's pretty unlikely that you'll only press Y for 3 frames or less.
- Here's a few images showing this window and the extended one.
| Gif |
|---|

|
Distance
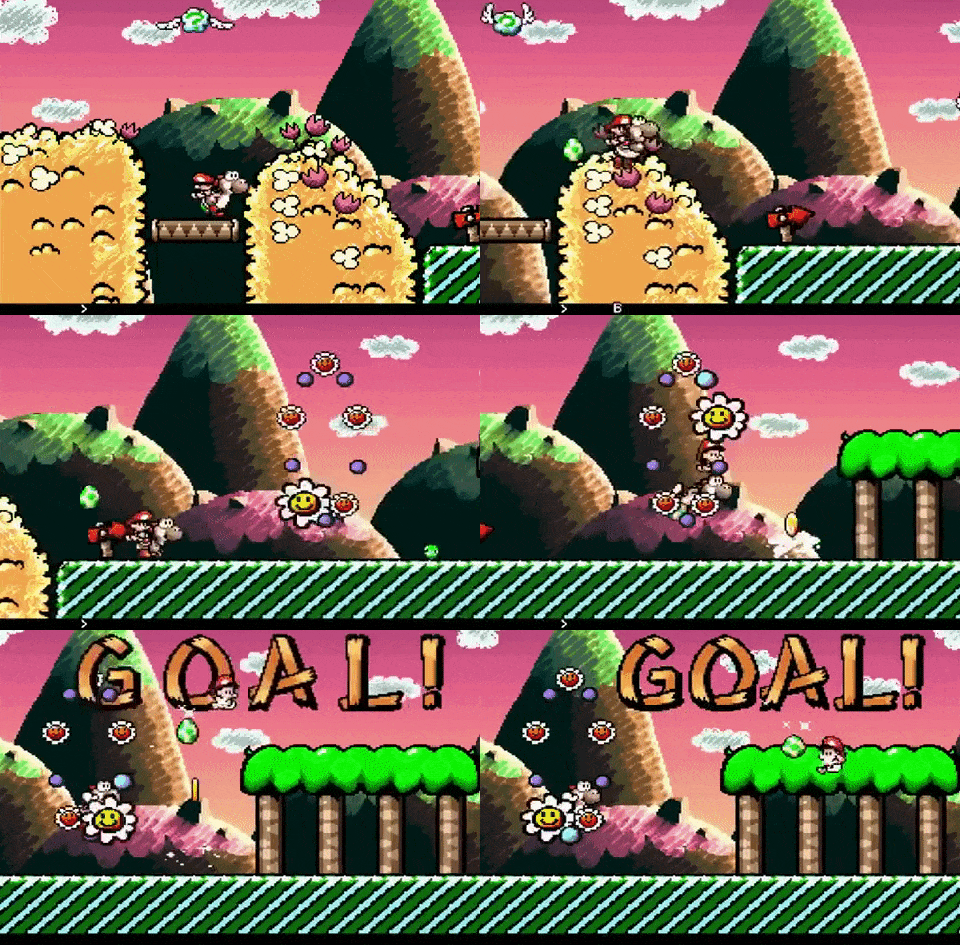
- If you stop at a specific distance from the goal ring, then run and jump into the goal without losing speed, you can skip the bonus. The reason being, you don't have enough time to reach full speed but rather, slightly slower. [89]
- This also works with any distance that results in a bonus skip, the main thing is that you have a good visual cue so that it can be done consistently. [90]
| Gif |
|---|

|
Terrain
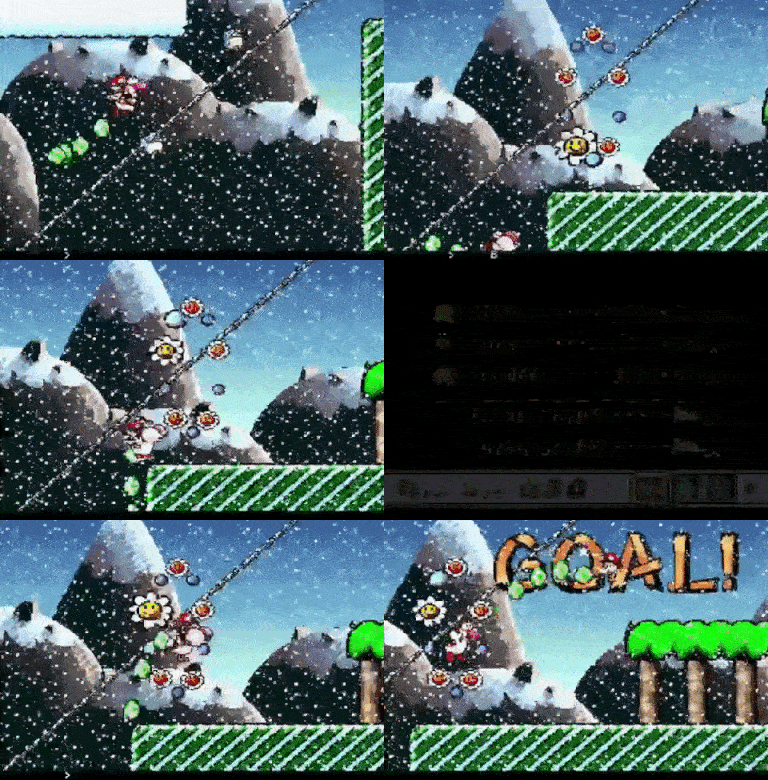
- You can use the terrain in a level like a slope, mud, snow or stairs to skip the bonus game. Running on slopes, mud, snow and down stairs slows you down.
- You can also use a moving platform to speed up (speed oscillation) or to just set up a bonus skip. [91]
| Gif |
|---|

|
Pause Buffer
- With Yoshi's nose touching the bottom left flower, you can repeatedly pause and unpause (pause buffering) until the goal ticker is on a dot or between a dot and a flower, then jump into the goal ring. [92]
| Gif |
|---|

|
Bonus Games Timing & Strats
A rough timing of Bonus Games and how much time they lose.
Flip Cards (W1 & W5)
- 0 Flips - 565 frames (9.41s)
- 1 Flip - Lose - 511f (8.51s)
- 1 Flip - Win - 802f (13.36s)
- If you want try your luck to get a +20 star item, open 1 or 2 cards, otherwise, leave immediately.
- Mashing upon exiting saves 127f (2.11s) and 191f (3.18s) if you flip 1 card and lose.
Scratch and Match (W1 & W4)
- 0 Marios - 23.53s
- 1 Mario - 24.88s
- 2 Marios - 25.70s
- 3 Marios - 28.55s
- Depending on the scratching animations you get, the bonus may be slightly longer (or shorter). The above timings are assumed to have the shortest animations.
- • X pattern = 329 frames (5.48s)
- • Diagonal = 326f (5.43s)
- • Vertical/Horizontal = 305f (5.08s)
- After scratching the 3rd card, begin mashing A and B to exit the bonus faster. This saves 127f (2.11s).
Drawing Lots (W2 & W4)
- Win - 13.30
- Lose - 13.47
Match Cards (W3 & W6)
- 0 correct flips - optimal movement - 29.04
- Getting +20 stars - roughly 36.47 (too many different combinations to test them all)
- Optimal strat: Unless you go for a +20, alternate between the top right and bottom right corner. Press left at the start to get to the bottom right corner. Press up/down to skip the cursor movement.
Roulette (W3 & W5)
- +1 - 18.92
- Optimal strat: Mash hard on the front buttons. DO NOT mash on the D-Pad, you could accidentally increase your bet (pressing down will put ALL your lives on the line and getting a x3 would mean getting a nice chunk of lives... takes forever though).
Slot Machine (W2 & W6)
- 0 Match - 14.21
- 3 Melons/other - 15.38
- 3 Cherries - 16.56
- 3 7's - 18.78
- Optimal strat: Mash hard.
- Swag - how to get triple 7 every time [93]
+20 Stars Strats
Bonus Games are pretty much always bad but at least some damage can be minimized by being smart about bonus games/items:
- A +20 star item can save roughly 10 seconds on 2-E because you'd be able to skip the star gathering room.
In 3-E: since this level also has a room dedicated solely to getting stars however, don't go for this without having practiced it before hand. It's not as easy as 2-E is and requires a bit of looking into to know how to do it properly.
- It can be used as a backup in any given level if you get hit, except for during boss fights (+10 star items too).
It really only matters for the following bonus games...
- Open 1 Window: Have a lucky day and get yourself a nice tasty +20. Nothing else to say here (random)
- Flip Cards: If you get +20 on the first flip, you can minimize the time lost overall (semi-random since you can decide to not flip any cards)
- Match Cards: Going for a +20 can be worthwhile here, since it can be faster to get +20 and use it on 2-E (sometimes there is no +20 to get)
3-4 crab room strat using an item
In the 3-4 crab room you have to normally shoot a total of 6 eggs and usually get to a star count of 20-22 doing that. Using an item like Melon, Fire, Ice, POW or the star cloud item, you might be able to save a little bit of time in 3-4. POW & Star Cloud item are faster than the 3 melon items.
Reminder: Since you have to get/play a bonus game for the item, you cant save time doing this, looking at the run as a whole. This is just to minimize damage if you already got a bonus and one of the mentioned items. So might as well use it at that point.
Remember that doing this will skip the stars created from shooting the crabs (If you do the standard speedrun strats for this level anyway), which means you will have to get stars elsewhere, probably having to take the first save ring that is normally skipped. However, time is saved by not having to get new eggs.
This whole strat has not been time intensively, just very roughly, and probably only saves like 1-2 seconds at most, maybe even loses time but in that case: ~ S W A G ~

